A quick step-by-step guide in setting-up your Fetch box.
Setting up your Fetch Box
1. Connect your Fetch Box to your Modem
You may connect your Fetch Box via Ethernet Cable or over Wi-Fi.
For Ethernet Connection
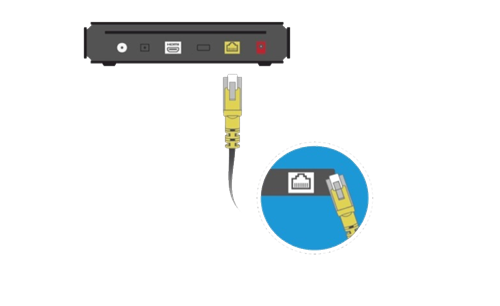
- Plug one end of an Ethernet cable into a free LAN port at the back of your modem
- Plug the other end into the port labelled INTERNET on the back of your Fetch Box
For Wi-Fi Connection
- Proceed with steps 2 to 5 first
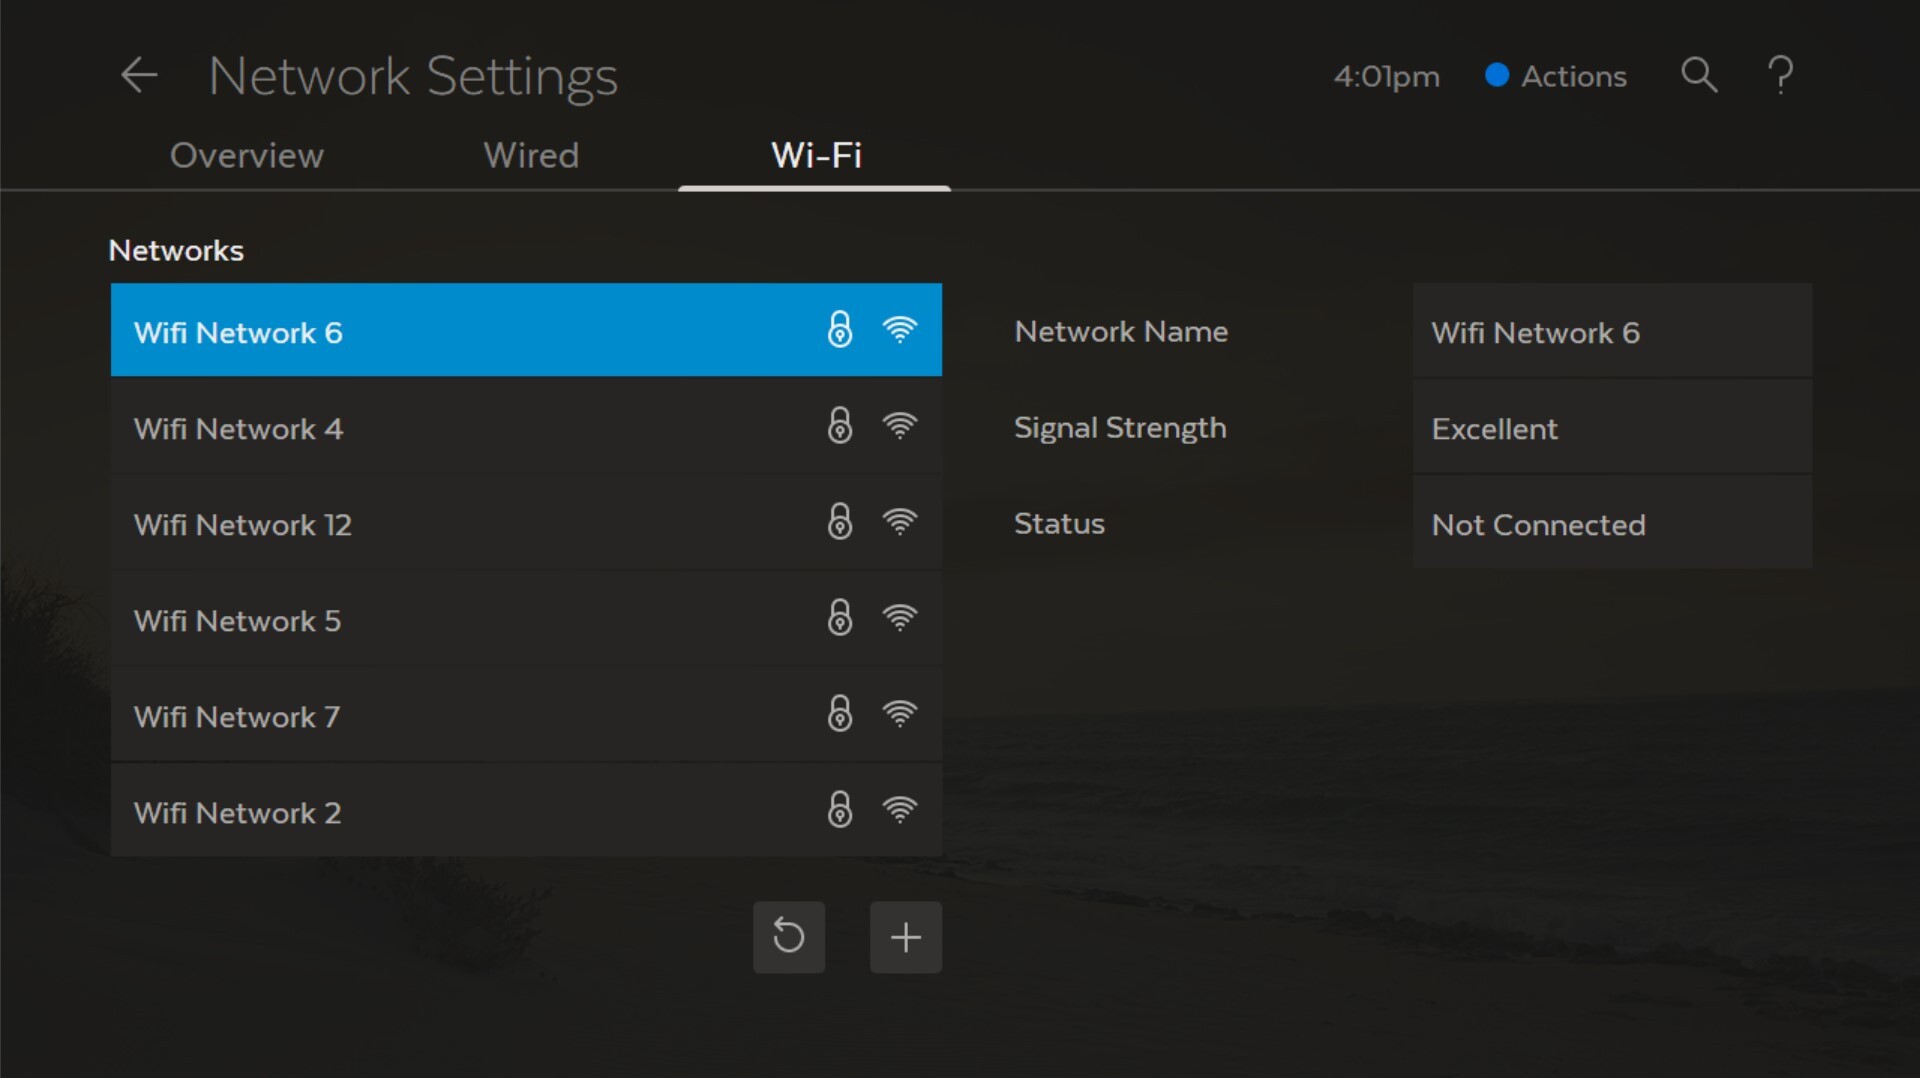
- Choose Wi-Fi Connection and follow the prompts
- Select your home network from the list of in range networks and connect with your Wi-Fi password
2. Connect to your TV Antenna
You get your Free-to-Air Digital TV channels using your normal TV antenna. They are not delivered over broadband Internet.
You’ll need your existing TV antenna cable, so unplug it from the back of your TV.
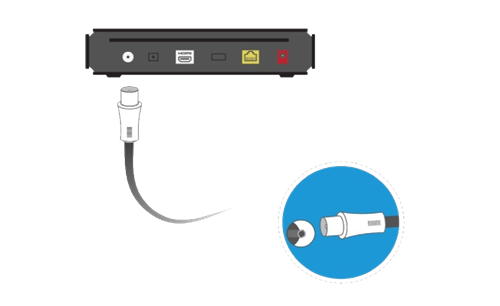
- Plug one end of the existing antenna cable into the antenna wall socket, or leave it if it’s already connected to the wall
- Plug the other end of the antenna cable into the socket labelled Antenna on the back of your Fetch TV Box
3. Connect to your TV
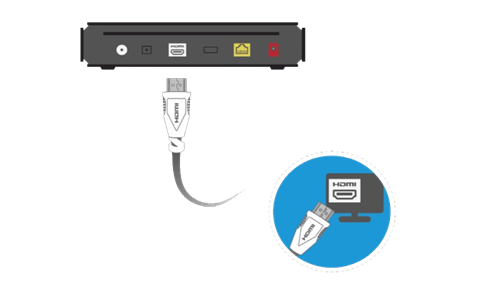
Your Fetch TV Box connects to your TV using HDMI (High Definition Multimedia Interface).
- Plug the HDMI cable into the port labelled HDMI on the back of the Fetch Box.
- Plug the other end into a free HDMI port on your TV.
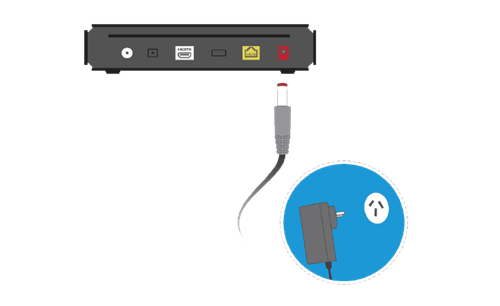
4. Connect to a power outlet
Once you’ve completed all the steps and put the batteries in your remote control it’s time to turn everything on.
- Plug the red end of the power supply unit into the Fetch Box
- Plug the power supply unit into the wall power socket (Use only with a 100V-240V 50Hz AC power source and only use the Power Supply provided)
- The power light on your Fetch Box will light up
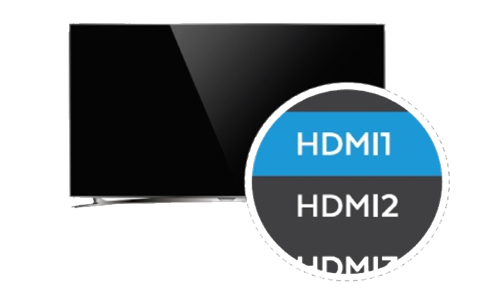
5. Select Source / Input on TV
Turn on your TV to complete the set-up.
- On your TV remote press Source/Input or AV Select
- Select the HDMI port you plugged your Fetch Box into
Enter your Activation Code to complete the set-up and you’re good to go!
Things to note:
To watch content in 4K on your Fetch Mighty, you’ll need:
- A connected 4K HDR TV
- A steady home broadband speed of 15-25 Mbps
- Video setting set to Auto (4K – 2160P) on your Fetch Mighty (you can do this later on Fetch at Menu > Manage > Settings > Audio & Visual > Video)
Setting up Fetch Multiroom
Any additional Fetch boxes you wish to add must be on the same iPrimus account. To add additional Fetch boxes to your account, please call iPrimus on 13 17 19.
Once you receive your Multiroom box(es) from iPrimus, please follow the steps in the Quick Start Guide to set it up. iPrimus will send you the Activation Code to enter as part of the Welcome process once the box is turned on.
Only one Mighty box can be included on your iPrimus account.